a-TroniX logo
a-TroniX logo
Accessories
AppCertificates
Configuration from A to Z
Control response timeController
Customer Specific
Devices
Boiler
Cloud
Energy Meter
Ev Charging Station
a-TroniXABBAlfenAlpitronicAmtronAutelBlitz-PowerEaseeEnovatesEtrelEVChargeKingFLEXeCHARGEGo-eHuawei SChargerIlumenKempowerMyEnergi EV Charging StationsNexBlueOCPPPeblar EV Charging StationsRaedianSchneider ElectricSiemensSMASofarTeltonika EV Charging StationsTriathlonVolt-TimeVoolWallbox EV Charging StationsXargeon / ZhongDe EnergyZaptec
Gas Meter
Heat Pump
New integrations
Plc
Pv Hybrid And Battery Inverters
Switched Loads
Water Meter
External Signals
InstallationLicenseNetworkQuick StartSafety, maintenance and legal noticesSpecificationsStatus LEDs
Troubleshooting
Wiring & connectivity guidelines
DevicesEv Charging Station

EVChargeKing charging stations

EVChargeKing

Supported Devices

Device TypeModbus TCP (Ethernet)
ETAPpro✅

ETAP Pro Configuration

  1. Download the E-Tap mobile app and create an account.
  2. Scan the QR code on the E-Tap Pro device or card it comes with to add it in the app
  3. During the setup, connect the EVChargeKing charging station to a network with the following requirements:
    • The charging station is in the same local network as the a-TroniX Controller.
    • Make sure the communication between the charging station and the a-TroniX Controller is open.
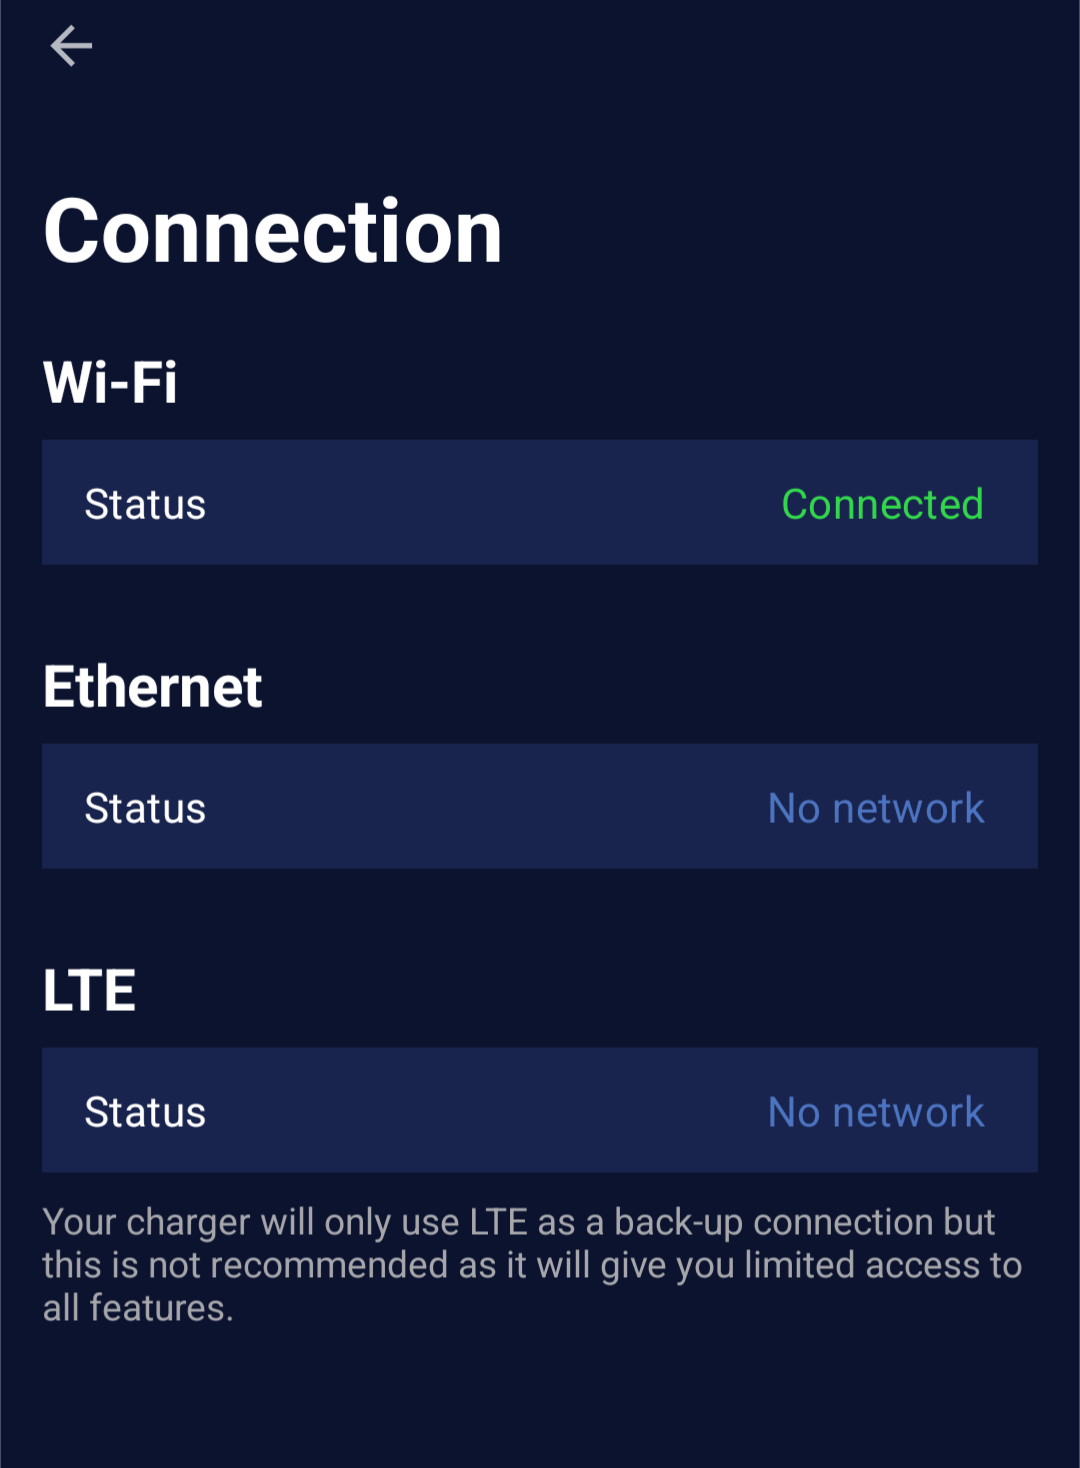
  4. Check that the device is connected to the internet in settings -> chargers -> select the charger -> Connection status. Either Wifi or Ethernet should be connected.
    ETAP Mobile App Network Page
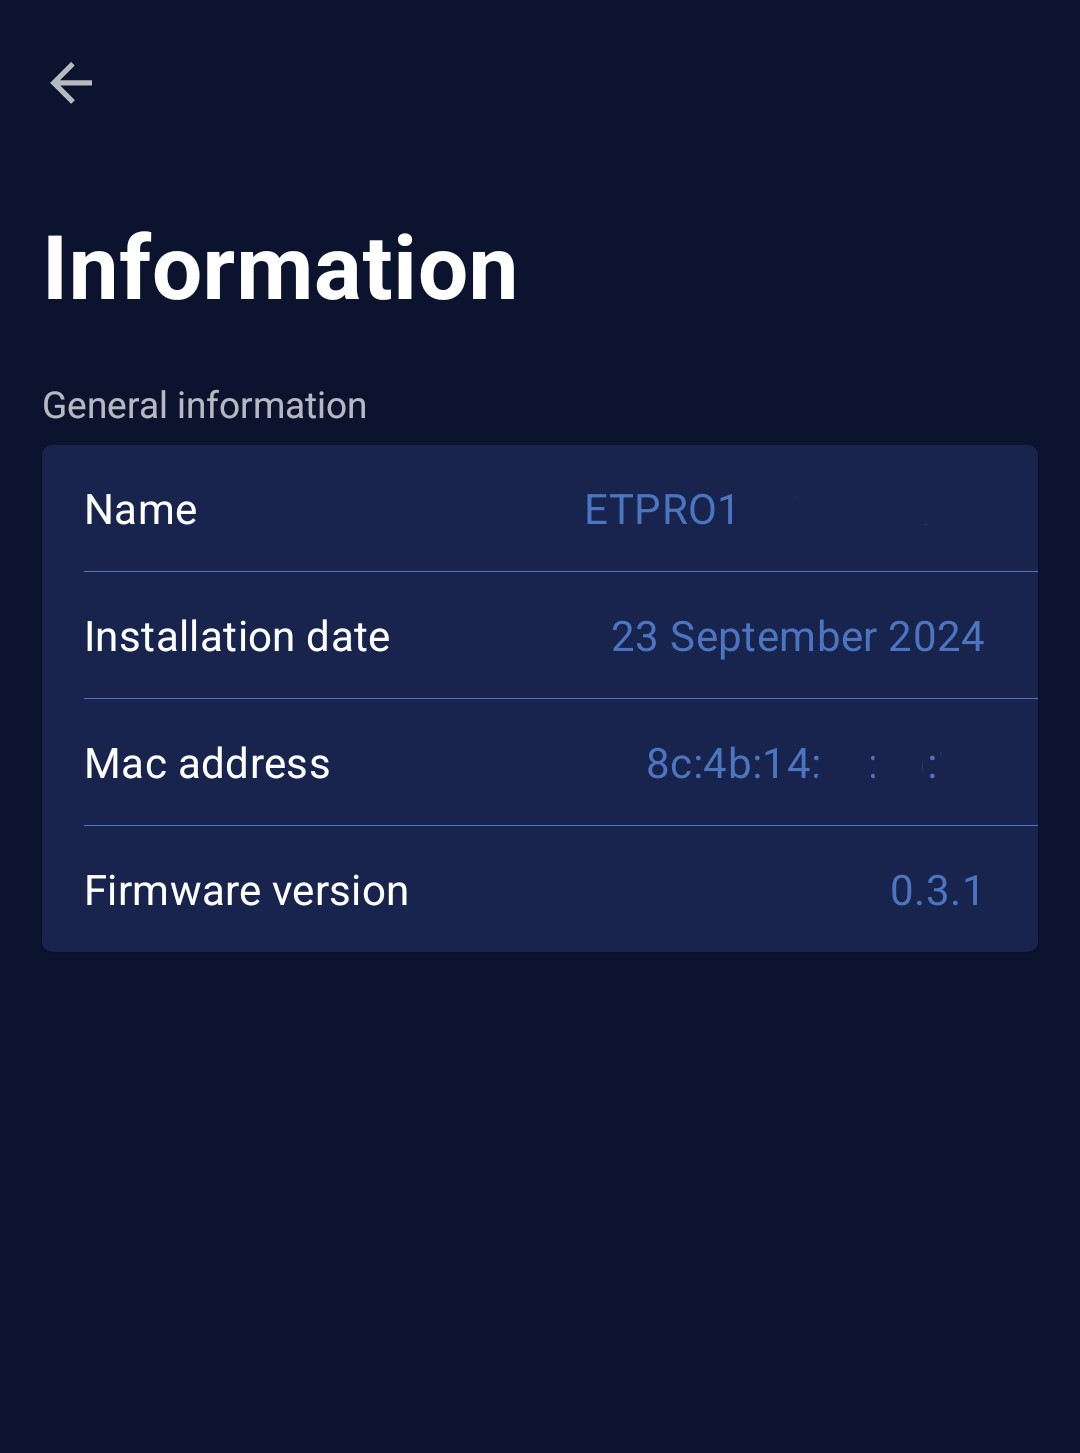
  5. Find the mac address of the device in settings -> chargers -> select the charger -> Information. This will be needed to add the device in the a-TroniX Controller.
    ETAP Mobile App Info Page
  6. The device should now be ready to be added in the a-TroniX Controller.
Last updated April 27, 2026Edit this page

Etrel

Previous Page

FLEXeCHARGE

Next Page

On this page

EVChargeKing charging stationsSupported DevicesETAP Pro Configuration