
Complete guide to managing, claiming, and configuring public display controllers in your portal.
Disclaimer
The mentioned functionalities may be restricted depending on the purchased software license.
Public display Controller Management
The public display controller is the physical hardware device that displays your custom visualizations. This comprehensive guide covers everything you need to know about controller management, from initial claiming to advanced configuration options.
📋 Overview
What is an Public display Controller?
The public display controller is a dedicated display device that:
- 🖥️ Renders custom visualizations (Public displays) created in a-TroniX app
- 📱 Supports various screen sizes with responsive layouts
- 🔧 Requires claiming to link with your a-TroniX app account
Key Features
| Feature | Description |
|---|---|
| 🎨 Custom Displays | Show personalized public displays based on your templates |
| 📊 Real-time Data | Display live installation data and metrics |
| 📐 Responsive Design | Automatically adapts to different screen sizes |
| 🔒 Secure Access | Requires verification codes for account linking |
| ⚙️ Remote Management | Configure and update displays from a-TroniX app web portal |
🚀 Getting Started
Prerequisites
Before you begin, ensure you have:
- ✅ Physical controller device with power supply, ethernet and a hdmi connection to a display
- ✅ a-TroniX app account with appropriate permissions
- ✅ Controller credentials (serial number and verification code from device sticker)
Important Security Information
Warning
Critical Security Notice 🔐 Safeguard Your Credentials: The serial number and verification code printed on your controller sticker are permanent and irreplaceable.
Best Practices:
- 📝 Document immediately - Record credentials in a secure file upon device receipt
- 🚫 Support limitations - Our support team cannot provide verification codes for security reasons
- 📷 Photo backup - Consider taking a clear photo of the sticker as additional backup
🎛️ Controller Management Interface
Accessing the Controller Section
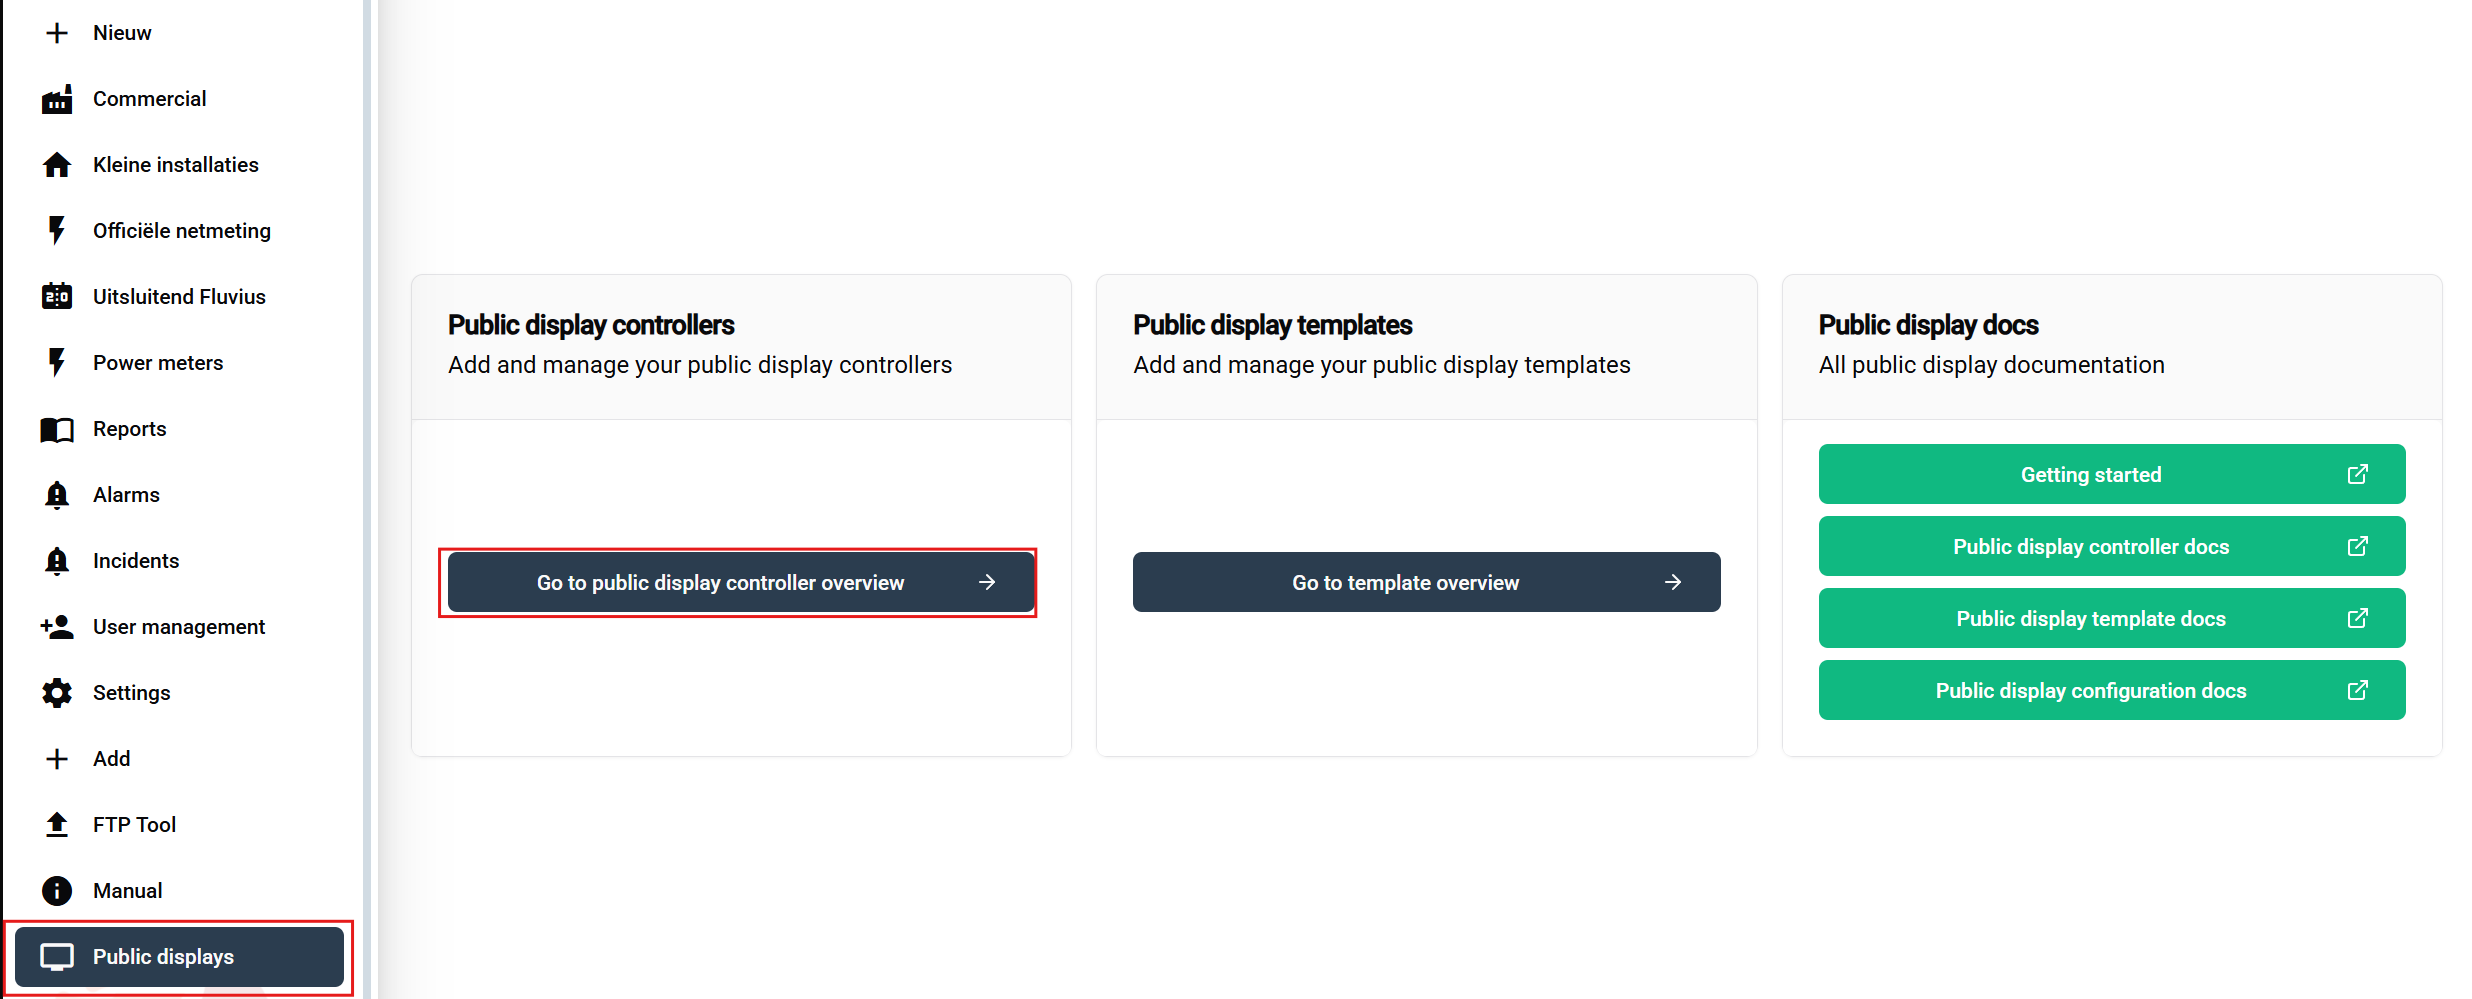
Navigation steps:
- Login to your a-TroniX app account
- Navigate to 'Public displays' in the main sidebar
- Click 'Go to public display controller overview' button on the overview page
This opens the controller overview table where you can view, claim, and manage all your devices.
Controller Overview Table
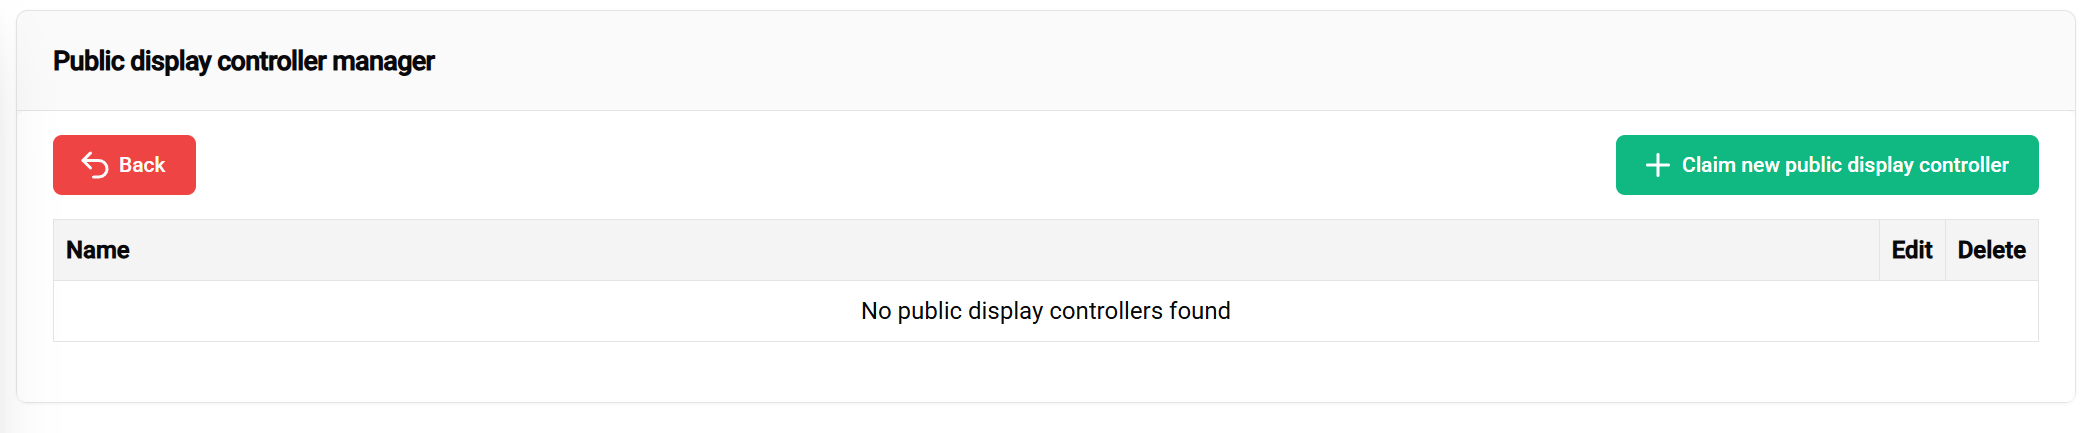
The controller table provides:
| Column | Information |
|---|---|
| 📟 Device Name | Custom name for easy identification |
| 🔢 Serial Number | Unique device identifier |
| ⚙️ Actions | Edit or unclaim options |
Interface elements:
- ➕ Claim Public display Controller - Green button (top-right) for adding new devices
- 📅 Table - Displays all claimed controllers with their details
🔗 Claiming Your Controller
Step-by-Step Claiming Process
1. Initiate Claiming
Click the green "Claim Public displays Controller" button to start the registration process.
2. Enter Controller Credentials
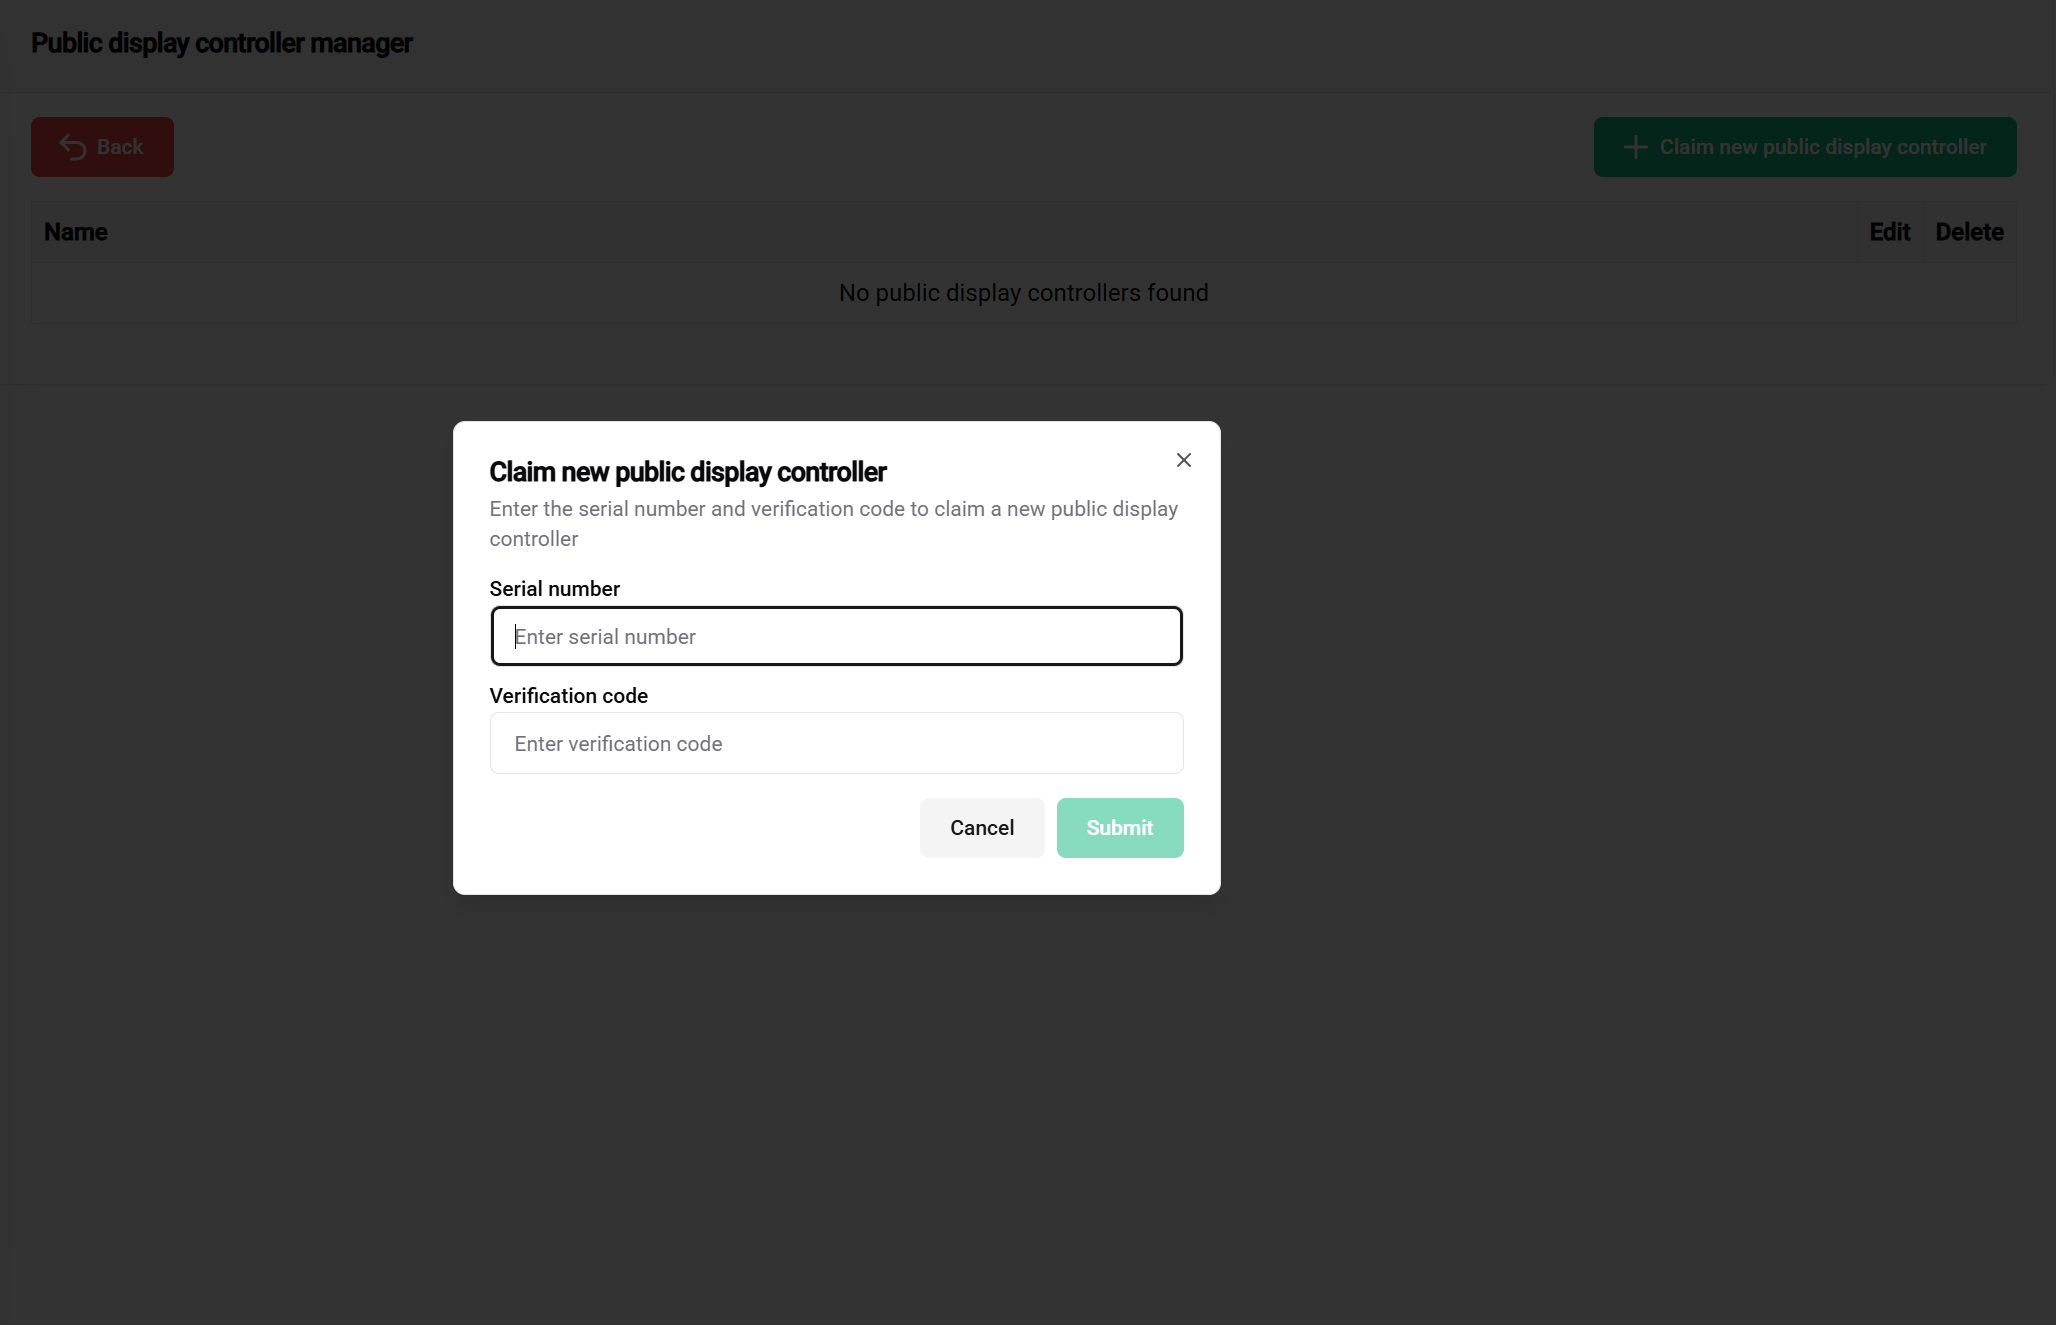
Required information:
Location: Printed on the controller device sticker
Format: Alphanumeric code (varies by model)
Purpose: Unique device identification
Tips:
- ✅ Double-check for accuracy
- ✅ Verify against device sticker multiple times
Location: Printed on the controller device sticker
Format: Security code (varies by model)
Purpose: Prevents unauthorized device claiming
Important notes:
- 📝 Document before use - Save in secure location
- 🔒 Do not share with unauthorized personnel
- ⚠️ Support cannot retrieve lost codes - Keep credentials secure and accessible
3. Submit and Verify
After entering both credentials:
- Double-check accuracy of both fields
- Click "Claim Controller" to submit
- Wait for verification - System validates credentials with device database
Claiming Results
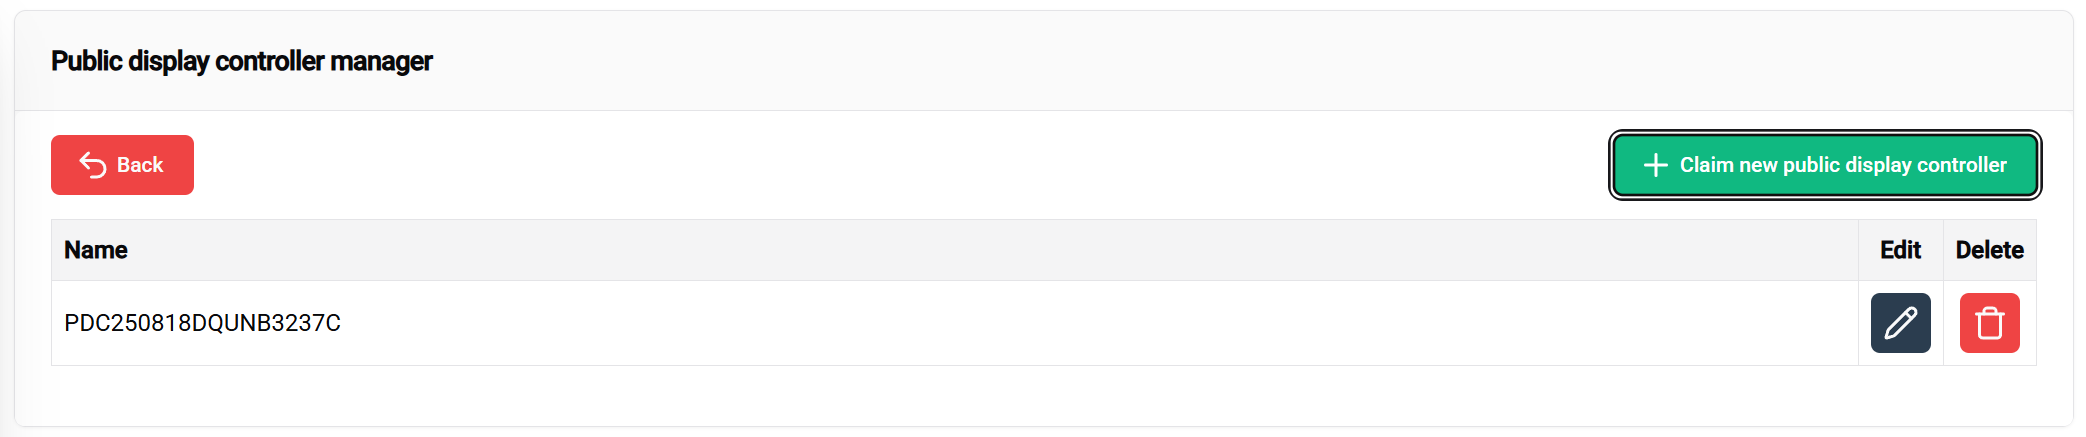
✅ Successful Claiming:
- Controller appears in your management table
- Default name assigned (usually based on serial number)
- Status shows as "Claimed" or "Ready for Configuration"
- Available for template assignment and configuration
❌ Common Claiming Issues:
| Error | Cause | Solution |
|---|---|---|
| Invalid Serial Number | Typo or incorrect format | Verify against device sticker |
| Invalid Verification Code | Incorrect code entry | Check sticker, ensure exact match |
| Already Claimed | Device registered to another account | Contact support if legitimate |
| Device Not Found | Serial number not in system | Verify device authenticity |
⚙️ Controller Configuration
Basic Controller Settings
Once claimed, you can configure various controller settings:
Device Naming
Purpose: Create meaningful names for easy identification in large deployments
Best practices:
- 🏢 Location-based: "Building-A-Lobby", "Factory-Floor-2"
- 🎯 Function-based: "Main-Dashboard", "KPI-Display"
- 📅 Project-based: "Project-Alpha-Monitor"
Network Configuration
Connection requirements:
- 🌐 Internet access (Ethernet only) for data synchronization
- 🔒 Firewall allowlist for a-TroniX app domains
- 📡 Stable connection for real-time updates
Advanced Management Options
Controller Actions
| Action | Purpose | When to Use |
|---|---|---|
| ✏️ Edit Name | Update controller identification | Reorganization, relocation |
| 🔗 Link Configuration | Assign public display templates | Initial setup, template changes |
| 🔓 Unclaim | Remove from account | Decommissioning, transfer |
📚 Related Documentation
Next Steps
After successfully claiming your controller:
- 📐 Create Templates - Design your visual layouts
- ⚙️ Configure Templates - Apply templates to installations
- 🚀 Getting Started Guide - Complete setup walkthrough
🎯 Ready to Deploy? With your controller properly claimed and configured, you're ready to create stunning public displays for your a-TroniX app installations!